- Welcome to Westlake Publishing Forums.

News:
REGARDING MEMBERSHIP ON THIS FORUM: Due to spam, our server has disabled the forum software to gain membership. The only way to become a new member is for you to send me a private e-mail with your preferred screen name (we prefer you use your real name, or some variant there-of), and email adress you would like to have associated with the account. -- Send the information to: Russ at finescalerr@msn.com
Recent posts
#71
Modellers At Work / Re: Feldbahnmodule with ship
Last post by finescalerr - May 22, 2026, 12:21:42 PMKeep playing with ChatGPT; your results are stunning. -- Russ
#72
Modellers At Work / Re: Feldbahnmodule with ship
Last post by Bill Gill - May 22, 2026, 08:55:46 AMLooking forward to see how the roofers turn out.
#73
Modellers At Work / Re: Feldbahnmodule with ship
Last post by fspg2 - May 22, 2026, 07:28:24 AMHi Lawrence,
Thanks so much for the tip about the credits.
@Hauk
The Preiser workers are supposed to be getting some reinforcements soon.
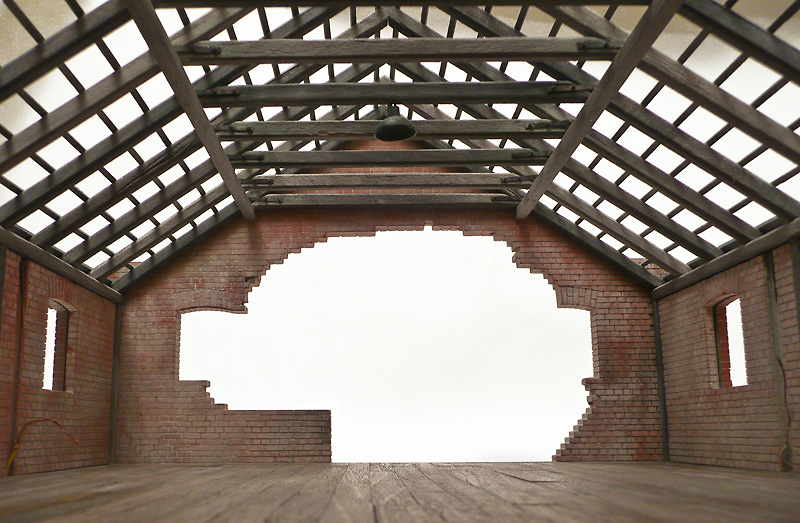
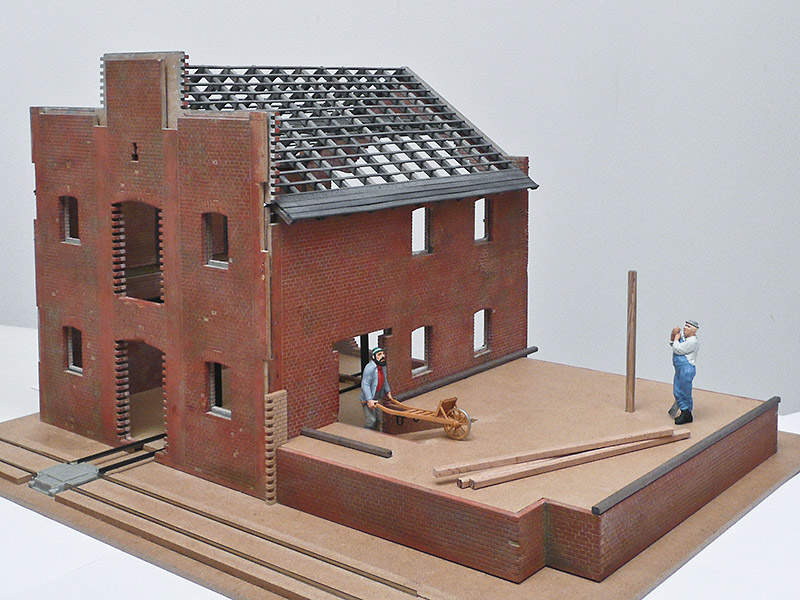
I've actually been looking for roofers for the roof of the old storage shed for a long time now, but so far, unfortunately, to no avail.
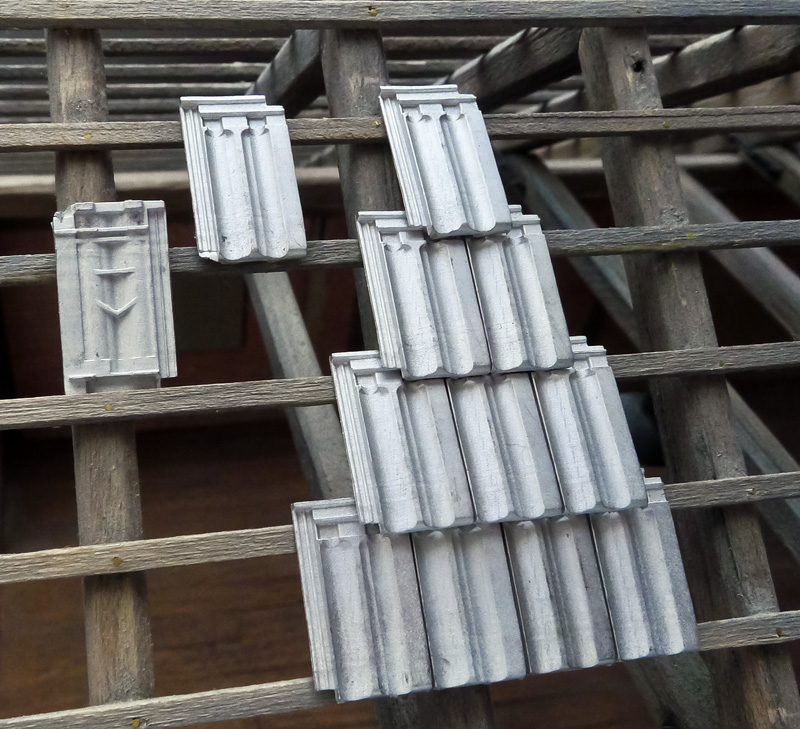
The roof tiles have been sitting in my drawer since July 26, 2014:
https://www.finescalerr.com/smf/index.php?topic=1424.195
Alter_Lagerschuppen_229 (fspg2)
Alter_Lagerschuppen_240 (fspg2)
Dachgerippe_04 (fspg2)
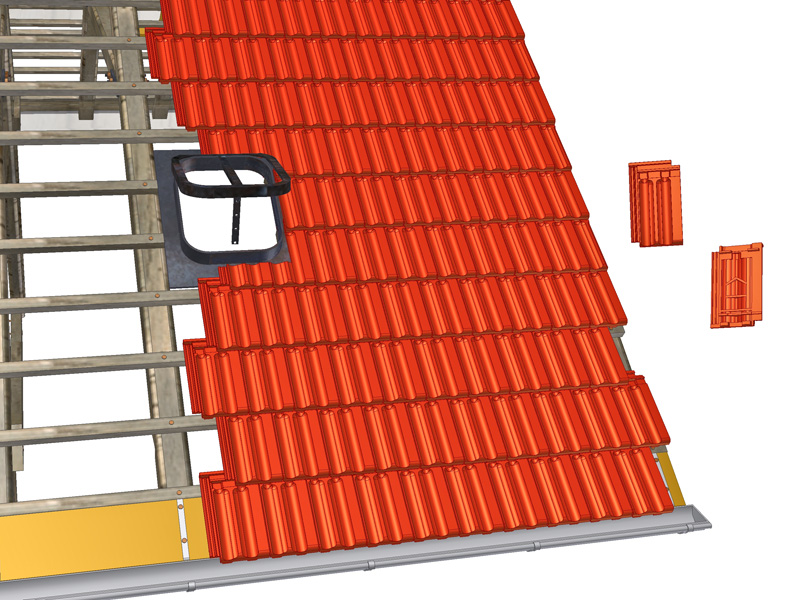
Doppelfalzziegel_008 (fspg2)
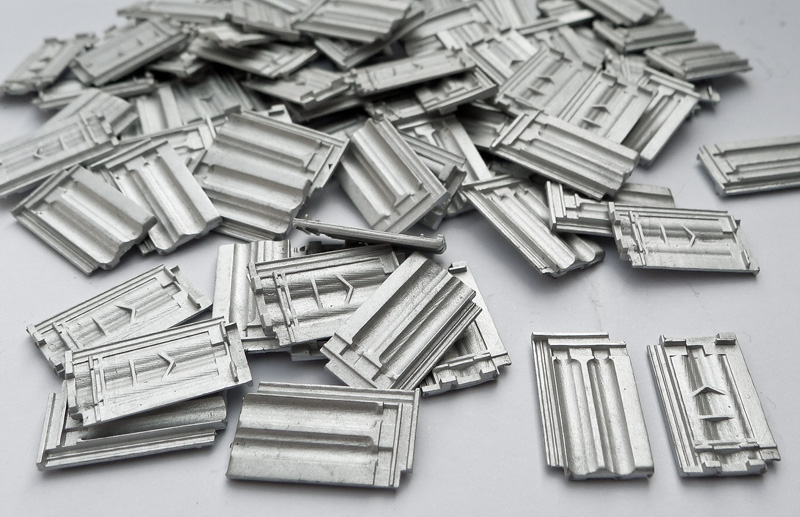
Doppelfalzziegel_010 (fspg2)
So today I played around with ChatGPT again and asked it about roofers.
Dachdecker_01 (fspg2)

Dachdecker_02 (fspg2)
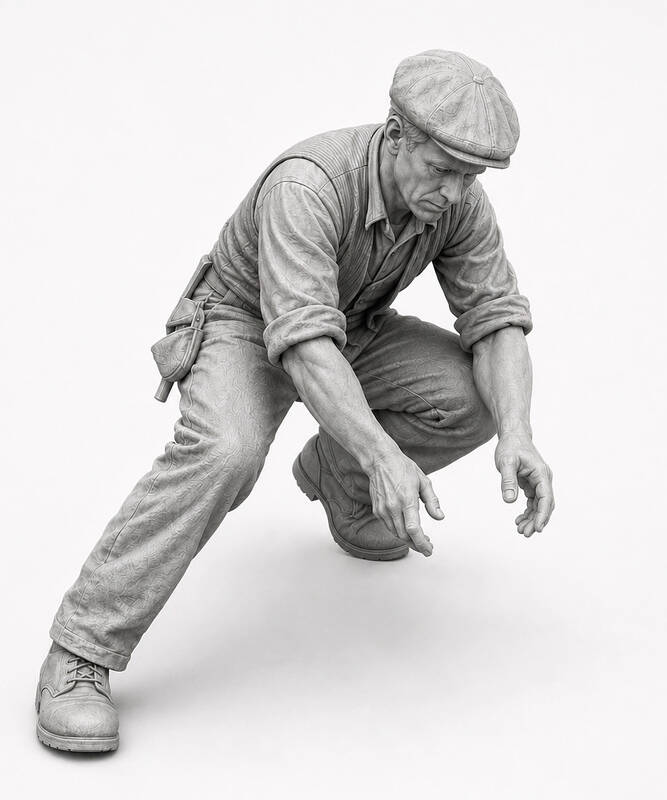
It's striking how similar the three workers' faces are—well, they were probably three brothers
Dachdecker_03 (fspg2)

The following two images show 3D renderings generated directly by TRIPO3D (text-to-image).
I definitely prefer ChatGPT!
Dachdecker_04_Tripo (fspg2)

Dachdecker_05_Tripo (fspg2)

All STL-files for resin print were also created using TRIPO3D.
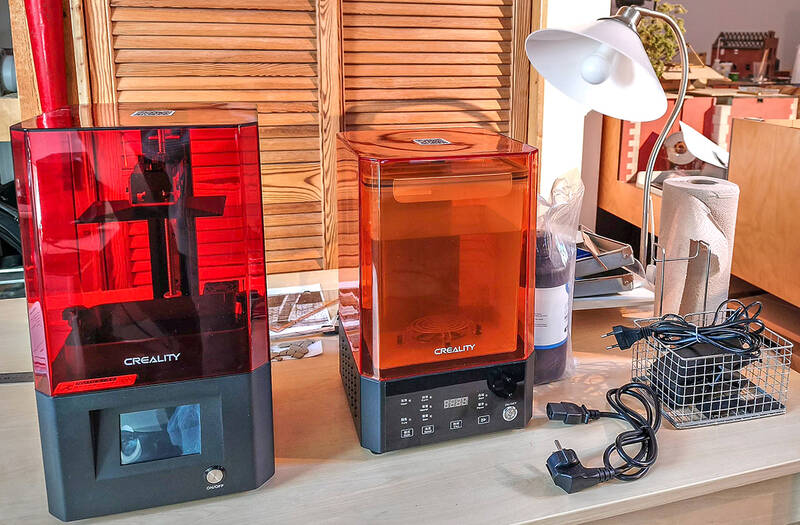
I guess it's about time I took a closer look at the gift I recently received from Steffen!
Creality_LD_002H (fspg2)
Let's see how it turns out!
Thanks so much for the tip about the credits.
@Hauk
The Preiser workers are supposed to be getting some reinforcements soon.
I've actually been looking for roofers for the roof of the old storage shed for a long time now, but so far, unfortunately, to no avail.
The roof tiles have been sitting in my drawer since July 26, 2014:
https://www.finescalerr.com/smf/index.php?topic=1424.195
Alter_Lagerschuppen_229 (fspg2)
Alter_Lagerschuppen_240 (fspg2)
Dachgerippe_04 (fspg2)
Doppelfalzziegel_008 (fspg2)
Doppelfalzziegel_010 (fspg2)
So today I played around with ChatGPT again and asked it about roofers.
Dachdecker_01 (fspg2)
Dachdecker_02 (fspg2)
It's striking how similar the three workers' faces are—well, they were probably three brothers
Dachdecker_03 (fspg2)
The following two images show 3D renderings generated directly by TRIPO3D (text-to-image).
I definitely prefer ChatGPT!
Dachdecker_04_Tripo (fspg2)
Dachdecker_05_Tripo (fspg2)
All STL-files for resin print were also created using TRIPO3D.
I guess it's about time I took a closer look at the gift I recently received from Steffen!
Creality_LD_002H (fspg2)
Let's see how it turns out!
#74
Modellers At Work / Re: Quiet earth (was: Exercise...
Last post by Hydrostat - May 22, 2026, 02:37:34 AMQuote from: lab-dad on May 21, 2026, 03:32:58 PMI am so proud for you!
You deserve all the praise you will surely receive.
I'm glad to say you helped me on my projects.
Is the book available for purchase?
Martin
Marty,
thank you. It was a pleasure to be a (indeed very small) part of your great loco project. Whenever you need help again please feel free to ask! Your reminder to that project stands right here in my cupboard:

Regarding the book: As far as I can judge it from over the pond it is available in the US - for example here. Please keep ion mind that it is in German.
Cheers,
Volker
#75
Modellers At Work / Re: Feldbahnmodule with ship
Last post by Hauk - May 22, 2026, 01:01:28 AMIf i was one of those flabby Preiser workers I would be seriously worried about my future in this prosject...
#76
Modellers At Work / Re: Quiet earth (was: Exercise...
Last post by lab-dad - May 21, 2026, 03:32:58 PMI am so proud for you!
You deserve all the praise you will surely receive.
I'm glad to say you helped me on my projects.
Is the book available for purchase?
Martin
You deserve all the praise you will surely receive.
I'm glad to say you helped me on my projects.
Is the book available for purchase?
Martin
#77
Cars, Trucks, and Other Vehicles / Re: Old Wagons
Last post by lab-dad - May 21, 2026, 03:21:58 PMGreat video!
Good thing my wagon ain't going anywhere now.
Thanks!
Mj
Good thing my wagon ain't going anywhere now.
Thanks!
Mj
#78
Modellers At Work / Re: A snapshot in time. A glim...
Last post by nk - May 21, 2026, 01:51:59 PMHoly guacamole Volker. Those lamp shades are amazing, as is every detail in this build. It is just a fantastic insight into German life of that period.
I am reminded of a Peter Carey short story called American Dreams, where the narrator makes a scale model of his hometown in great detail including all the residents and some indiscretions...
I am reminded of a Peter Carey short story called American Dreams, where the narrator makes a scale model of his hometown in great detail including all the residents and some indiscretions...
#79
Modellers At Work / Re: Luke's Garage & Gas Statio...
Last post by Hydrostat - May 21, 2026, 12:25:39 PMQuote from: finescalerr on May 21, 2026, 12:17:48 PMIt may be 1:1 scale and naturally weathered but it looks less real than some models on this forum. Does anyone find that disturbing? -- Russ
That's exactly what came to my mind, too!
#80
Modellers At Work / Re: Luke's Garage & Gas Statio...
Last post by finescalerr - May 21, 2026, 12:17:48 PMIt may be 1:1 scale and naturally weathered but it looks less real than some models on this forum. Does anyone find that disturbing? -- Russ